gekk.info « articles
OS/2 on Virtualbox Guide
Preamble

OS/2 is an absolutely fascinating operating system and I want you to see it.
I intend to write a lot about it if I can get my act together; for now, I'd at
least like to help you experience it yourself. It's a trip and a half.
When I started looking into getting it working on a virtual machine, I had a
hard time finding some crucial information and files, there were steps in the
install process that were not explained in the few guides I could find, it
wasn't clear to me which versions could be installed, and some of the install
files were in formats I couldn't read.
Now that I've figured out all those problems I've created a guide with specific instructions on how to get
all major versions working on VirtualBox, complete with sound, video and network
in some cases, and you'll
find those guides below. I also created prebuilt virtual machines you can just
download and press play on.
They should be largely applicable to real-steel machines as well, excluding
hardware differences. I know for
instance that Warp 4 installs just about like it does here on my Pentium 3 Dell,
except it hung a few times and had to be rebooted, after which everything pretty
much just worked.
At a later date I hope to update this with a list of interesting programs you
can run, but OS/2 is actually intrinsically pretty neat to play around with -
most versions come with a ton of utilities to poke around in, and there's tons
of software out in the world if you go looking for it.
Have fun!
If you like my work, consider
tossing me a few bucks. It takes a lot of effort and payment helps me
stay
motivated.
Prebuilt Images
You can grab prebuilt images of OS/2 VMs that I created for use with
Virtualbox 6.0+ from here
 .
.
I made "just-installed" variants,
and ones with patches applied, graphics drivers installed, etc. for (at this
time):
- OS/2 1.1
- OS/2 1.3
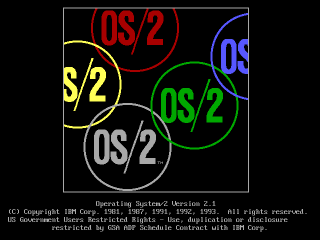
- OS/2 2.1
- Warp 3
- Warp 4
- Warp 4.5
If you use one of those, almost nothing in this doc is relevant. If you'd prefer to experience the joy of installing and configuring, or are
working on a real-steel machine, press on.
Which Version?
Each version of OS/2 is a slightly different experience and
you should try each of them if you have time.
For the record, "Warp"
means nothing. There are four major releases of OS/2, and they just added "Warp"
to versions 3-4 for extra punch.
os2museum.com covers a lot of
this stuff in better detail. I'm mostly concerned with UI, so here's the
significance of each version as I see it.
I picked the versions I thought were most interesting (the
linked ones below) to
make instructions and VMs for:
- 1.0 is impossible to run on a modern machine and is a useless curiosity
anyway (no GUI)
- 1.1 is their first somewhat viable OS. It predates
Windows 3 but looks kinda like it while having way fewer features.
- 1.2 looks a lot more like Windows 3
- 1.3 is a slight update and service pack for 1.2
- 2.0 is where they introduced their unique GUI. A lot of the user
experience crystallized at this point and it's probably the first one that's
really relevant to the ideas and intentions that define OS/2
- 2.1 is mostly significant because it added multimedia
support (sound and video)
- 2.11 added multiprocessor support
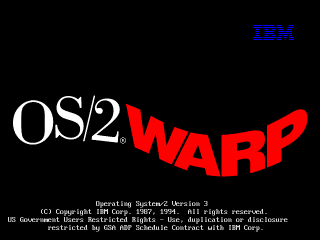
- Warp 3 is a huge UI overhaul and adds a bunch of
interface features
- Warp 4 is another significant UI overhaul and adds a
bunch more interface features
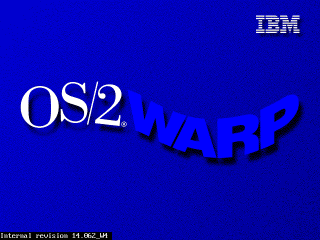
- Warp 4.5 is a weird creature, sort of like the OS plus
a service pack / driver / third party software pack. I personally think it
feels a little "grimier" than Warp 4, and from what I understand it was
essentially released after IBM had stopped trying to succeed with OS/2 and
just wanted to support existing customers.
It does have built in SVGA graphics, so you won't have to go through the
extra step of patching and installing drivers, and it includes a version of
Netscape, for whatever that's worth.
A note on eComStation & ArcaOS
You should be aware that after Warp 4, OS/2 was sold to another company,
rebadged as eComStation and continued sales for some time, was sold again,
rebadged as ArcaOS and continued. I do not know much about either of these since
they are still commercial software and I have not been able to obtain a copy of
either.
Info you find online about either of these may apply to OS/2, but
may not. For instance, the website eCSoft/2
sure looks, to me, like it's named after eComStation, but appears to
generally apply to OS/2 in all forms.
Important Notes On Using OS/2
Here are some assorted notes about the general experience of OS/2:
Note: On real hardware, or on other VM
platforms, I have found OS/2 to be extremely fragile. When I
installed it on my real P1 and P3 Dell machines, I had to reboot multiple
times during the setup and driver install processes due to hangs, and I had
a ton of issues with random errors on boot.
I also tried all this on QEMU 4.2.0 and had very similar problems, and I
had developed some very negative opinions about OS/2's reliability before I
switched to Virtualbox and found that it was actually quite solid and the
installs went very smoothly.
- To restart OS/2 gracefully, right click on the desktop, select Shut Down,
and wait for it to give you permission to power off; then hit the reset button
on your VM.
- As mentioned above, if you boot up and it hangs at a flashing prompt, reboot,
then reboot again.
- This is only applicable if you just see a black screen with blinking cursor -
if you saw the little grey "OS2" banner in the upper left corner and THEN the
machine froze, you're having a different problem.
- Sometimes you have to power down *completely* if this keeps happening. With a
VM, that means close the machine, don't just reset it.
- If you're hanging at a screen saying something like "UDF configuration" or
something about IP addresses, just wait a while.
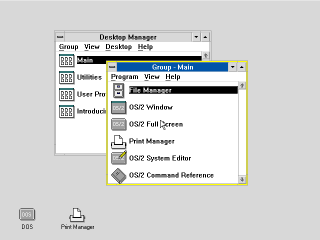
- In Warp 4 there are (sort of) obvious "close" buttons on windows, but Warp 3
is modeled on Windows 3 so there are none. The icon in the upper left of every
window opens the menu; double-clicking it will close the window.
- Sometimes that icon is a downward-pointing arrow that looks like it'll
minimize the window, but it works as normal.
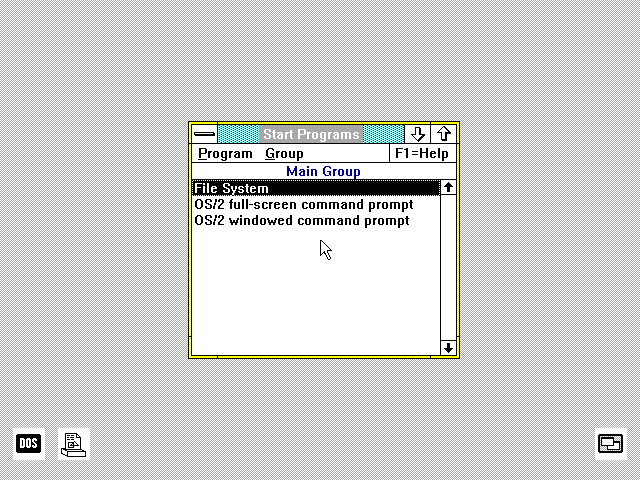
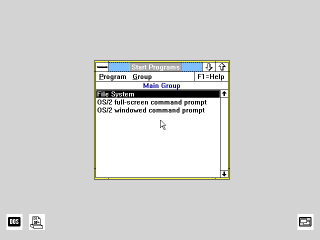
- There are two types of command prompt in OS/2, "DOS" and "OS/2". They are
actually completely different but look fairly similar. You should use the OS/2
command prompt in most cases where a command window is needed.
- You can launch both from the "taskbar". In Warp 3 it has a pretty big "C:\"
icon; in Warp 4 it has a tiny C: icon over a folder.
- OS/2 operates with some kind of inexplicable "overlay filesystem" that's very
confusing. I don't understand it at all. In short, some files are visible to the
DOS side of the OS, and some files are only visible to the OS/2 side. It may
have something to do with filename length, I don't know.
- If you minimize a window it goes to the Shadow Realm. To recover:
- Warp 3: Click the "Window List" button on the "taskbar" and double click the
name of the window you minimized.
- Warp 4: Same as 3, but the Window List is the button right next to the "start
menu" on the "taskbar"
- If you hit Ctrl+Alt+Del you'll reboot instantly. What you might want instead
is Ctrl+Esc, which pulls up the Window List or, if a program is hanging the
system, activates the watchdog, and after a few seconds you'll get a "end this
program?" dialog which can be used to recover.
- In Warp 3/4 icons can easily get "lost" outside of a file browser window.
Like, if you open the "control panel", you might think you're seeing all the
icons, but if you scroll way, way, way down you'll find one hanging out a mile
below the rest. Right click and Arrange if you suspect this.
- If you open a folder in OS/2 and it shows up in a tree view, beware! Tree
views ONLY show folders, NOT files.
- Warp 3, you can only fix this by double clicking the folder at the top of
the tree view to open it in icon view
- Warp 4, you can go to View and select Icon View
- To change some hardware settings - like the keyboard map or sound card - use
the Selective Install tool, in System Setup, which basically reruns the OS
installer
- This tool seems to be pretty janky. The CDROM field always shows up
empty, which is disturbing but doesn't seem to actually remove the driver if
I hit install. It also doesn't correctly reflect which sound card I have
selected.
Converting DSK Images
You may need to install from OS/2 floppies at some point. IBM had their own
floppy image format called DSK. Some modern software will read it, some won't.
Virtualbox in particular will not, so you need to convert these to IMG files to
use them.
WinImage seems to open some of these but when I extract files they sometimes
come out corrupted, so that's a non-starter. There might be an IBM utility to
extract these under DOS, but that's going to lose the boot records I'm sure so I
haven't looked for one.
IBM provides LOADDSKF, an OS/2 utility that writes a DSK to a floppy. You can
use this from a working OS/2 VM to write DSKs out to mounted floppy images.
There's a DOS version but I haven't experimented with it. It would be nice to
use it in DOSbox but I recall trying and failing. It might also work from a DOS
VM, but I just use Warp 4.5.
Here's how I do this:
- Install Warp 4.5 on a Virtualbox VM and boot it up
- Open the Warp install CD, then the DISKIMGS folder
- Copy LOADDSKF.EXE to C:\OS2
- Grab all the DSK files you need to convert and stuff them in an ISO with e.g.
Imgburn/CDBurnerXP
- Mount the ISO in your OS/2 system
- From a command prompt, go to D:
- In Virtualbox, go to Devices > Floppy >
Create a new floppy disk...
- Name it disk1.img and hit OK. This will create a blank disk image on your
machine.
- Go to the folder where you made the disk on your real machine and copy/paste
it until you have enough images for the entire disk set, then rename them all
appropriately.
- From OS/2, execute LOADDSKF DISK1.DSK A: and the first image will be written
to disk1.img
- Load disk2.img and repeat the process until all disks are written
Now you have a set of IMGs.
Installation Processes
Partitioning
If you begin your install process with a blank hard drive, OS/2 should generally
just figure it out on its own when you choose "accept disk as is."
If the drive is anything *but* blank, weird things may start happening.
OS/2's partition manager is not a very smart cookie. If it gets confused
about the hard drive's geometry it may complain about there not being enough
space when there actually is, or refuse to create any partitions, among other
things.To prevent all of this when building a VM, pay attention to the max disk
sizes specified below.
Disks larger than 2.1GB require a boot floppy patch. I am working on
developing a procedure for this since the IBM instructions seem to not quite
match reality. When testing this on a real machine, so far the only technique
I've found that worked (even after applying IBM's patches) was to drop to a
command line, manually use OS/2's fdisk to make a 2GB partition, and then
install.
Installing OS/2 1.x
OS/2 1.x will crash on any modern system unless you patch some files. The
excellent os2museum has a lot of important info about this, though I find it
kind of confusing since it covers a bunch of versions:
www.os2museum.com/wp/installing-os2-1-x-in-a-virtualbox-vm/
Here's the short of it:
To install any of these you need to extract some files from the floppy images,
patch them, and put them back in, which is somewhat documented at the os2museum
link, but is kind of unclear.
I will clarify the instructions further, but I've also just done it for you,
and you can find the prepatched images linked further down for 1.1 and 1.3.
The process I used is:
- Begin with all disks in IMG format, having converted them with Winimage or
using the process I described earlier. Python 2.7 installed, and patchos2.py is
in a folder with the disk images
- Using 7zip or Winimage, open INSTALL.IMG
- Extract the affected file to a folder
- For 1.0/1.0: KBD01.sys
- For 1.2/1.3: BASEDD01.SYS / BASEDD02.SYS /
BASEDD03.SYS
- Drag each affected file onto patchos2.py; a <file>.bak will appear if it
succeeded
- Using Winimage, put the affected file back into INSTALL.IMG and save
Doing this without Winimage is kind of a pain. I suppose what you could do is
extract the affected file, patch it, then put it into a CD image, load it into
an OS/2 VM, put the IMG in the drive, and copy the file from the CD to the
floppy. That ought to work.
Now we can install!
Note - versions 1.0/1.2
As mentioned earlier, 1.0 is a pain to get working but also pointless.
1.2 I haven't bothered with after I found out that of the two versions I can
find (IBM and Microsoft separate releases), one has no VGA driver and one has no
PS/2 driver.
I'm told 1.3 is basically identical to 1.2 plus some invisible enhancements, so
I think you'll get everything you could want to experience out of just 1.1 and
1.3.
Note - Patching
Remember that OS/2 1.x requires
patching before it can be used.
The prepatched disks can be found
here
Or you can get the originals at
winworldpc.com/product/os-2-1x/11 [
IBM OS/2 1.10 Extended
Edition (3.5-1.44mb) ]
I don't even need to give instructions for this one. Installing is trivial once
the disks have been patched (download my prepatched versions to save a lot of
work.)
Just boot from install.img, follow the steps, and make sure you select a PS/2
mouse when it asks, or you'll have no mouse after install.
Note - Patching
Remember that OS/2 1.x requires
patching before it
can be used.
The prepatched disks can be found
here
Or you can get the originals at
winworldpc.com/product/os-2-1x/13 [
IBM OS/2 1.30 Extended
Edition (3.5-1.44mb) ]
- Create a Virtualbox 6.0 machine with the Other OS/2
type and a 500MB HDD
- Having patched install.img (or using my prepatched versions), boot from it
- Follow the instructions on screen
- Accept its partition scheme; reboot when asked
- Insert Disk 1 when asked
- Follow the steps; pick "Accept disk" and "High Performance File System"
- Important note! When it formats the disk, it will be very slow, because it's
formatting the entire disk. This is different from other OSes, which do a "quick
format." What does this mean? It means your "500MB maximum size" VM disk image,
which was only a couple megs, just grew to 500 actual megs.
- I'm not sure what the "base operating system" is; I selected "Custom" and
checked everything. Remember to use spacebar to select an item.
- Select an appropriate language
- On "Select Display Adapter", pick "No"
- Use spacebar to check "Video Graphics Adapter" and press Enter
- Select Microsoft Mouse, PS/2 Version
- Accept Configuration
- Insert disks as requested to complete install
- Select "do not install default printer"
- Answer "no" to the Device Support Diskette
- Answer "no" to the Custom Install Diskette and
Basic Configuration Services
- On the screen with the Communications Manager, etc. press
F3 to bypass
- Remove disk and restart as suggested
Install is now complete.
There is a CDROM version of Warp 2.1 that I wasn't able to figure out. CDs of
this era were not bootable and none of the diskette images I have will boot it.
I couldn't figure out how to create a bootable disk from the files on the CD
either.
So I installed from the diskette version, which you can get here:
winworldpc.com/product/os-2-20/21 under the name "IBM OS2 2.1
(3.5-1.44mb)"
- Create a Virtualbox 6.0 machine with the Other OS/2
type and a 500MB HDD
- Insert Install.img and boot; insert disk 1 when asked
- Accept the first couple screens, and agree to use the default partitioning
scheme
- Put the install disk back in as requested and hit enter to restart
- Follow the steps; pick "Accept disk" and "High Performance File System"
- Important note! When it formats the disk, it will be very slow, because it's
formatting the entire disk. This is different from other OSes, which do a "quick
format." What does this mean? It means your 500MB maximum size" VM disk image,
which was only a couple megs, just grew to 500 actual megs.
- Insert install diskettes as requested until it restarts into the graphical
installer.
- Select "Install all features" and click OK
- This next screen is misleading. Let me explain:
- As the text says, the checkboxes here mean "I want to CHANGE this option." The
values you see under the checkboxes are what's going to be installed already,
which should be fine as-is.
- There are no IDE CD-ROM drivers, but check the box next to
CD-ROM
- You might be able to get a SCSI CDROM to work if Virtualbox
supports one, but that doesn't sound like fun to me so I didn't try
- After you click OK you'll be prompted to choose a CD-ROM; pick "Other"
(again, this will not result in a working CD-ROM yet; see next section)
- Click OK a couple times to start inserting disks
- After the last disk you'll get an Advanced Options window. Accept the
"Migrate" and "Configure WIN-OS/2" options and click
OK.
- Click OK again
- Click Find..., then Migrate
- Click Exit in the Find Programs window and
Yes, then OK to proceed
- Continue to follow prompts until the installer restarts the machine
You should now have a working OS/2 2.1 system. Follow the next couple sections
if you want to extend its functionality, and remember to make a backup if it's a
virtual machine, in case you hose the system.
Adding CD-ROM Support
For CD-ROM support I'm told you should have the "IBM IDE CD-ROM Option/Device
Driver Diskette." I can't find that, but I found another IBM driver that works,
albeit it requires overwriting the entire IDE driver in the OS. I made an image
of it here
It seems to work, and the prebuilt VM I made with "CD_MM" in the name has it
installed, as well as the multimedia extensions (though the sound doesn't seem
to work yet) but if you need to install it yourself:
- After OS/2 2.1 is installed, go to System Setup and run
Selective Install
- Check the box next to the CD-ROM and hit Next
- From the list, select "Other"
- Complete the install process, inserting the disk it requests, and restart
afterwards
- Insert cdrom.img
- Open C:\OS2 in a browser window, and A:\ in another
- Select all files on A: and drag (with the RIGHT button!) to
C:\OS2
- Let it overwrite
- Edit C:\CONFIG.SYS
- At the bottom, add: BASEDEV=IBMIDECD.FLT
- Save and restart the machine
You should now have a CDROM in Drives.
Adding Multimedia Support
This install uses the diskette form of OS/2 2.1 since I couldn't figure out how
to get the CD version to boot. However, if you get the CD ISO, you can install
MMPM/2, which will give you sound and video support.
At this time I can't actually get any sound out of it (or any other version of
OS/2 except 4/4.5) but maybe your luck will be better. It's preinstalled on the
prebuilt VM I made with "CD_MM" in the name, but you can install it yourself as
follows:
- Install CD-ROM support
- Mount the OS/2 2.1 CD
- Open the "MMPR2" folder
- Run MINSTALL.EXE
That's it.
Note: Sound doesn't seem to work. I'm not sure why. It works on Warp 4/4.5
Installing Warp 3 on Virtualbox 6.0 is actually a fairly smooth process. It
didn't use to be, it used to suck. Things have improved.
First you'll want Warp 3. Get it here:
archive.org/details/IBMOS2Warp3Collection
IBM OS2 Warp 3 Connect - Blue - 8.200 - English -
CDROM.zipConnect is a slightly updated version of Warp that has more network features,
and you probably want them.
- Extract the zip.
- That archive has the boot floppies in DSK. I've made IMGs for you
here
.
- Create a Virtualbox machine. Select OS/2 Warp 3 and accept the
defaults. 2GB disk max.
- Mount the install CDROM and the floppy image install.img,
and boot the machine.
- When prompted, swap in disk01.img. You'll get into the installer.
- Select Advanced mode.
- Accept the hard disk as-is.
- Select High Performance File System
- Wait through the copying phase
- When it asks you to remove the diskette and press enter to restart, do so.
- If you reboot manually without pressing enter here it might mess up the
install.
- Remove the floppy from the drive and press enter.
- It may, in fact, fail to reboot at this point. That's fine. You have to let it
try, and if/when it hangs at a black screen, THEN reset the machine.
- On boot you're going to get the graphical config interface.
- If you just get a blinking cursor, reboot a few times.
- All the defaults on the first page are fine except for CDROM and
Audio
- For CDROM, scroll to the bottom of the list and pick "NON LISTED IDE CDROM"
- For Audio, pick Soundblaster 16
- Continue
- You probably don't want a printer, so hit OK
- You probably want to select all the boxes on the software configuration page.
Click Install
- When prompted for networking support, select Yes
- On the Product Selection page, enable IBM TCP/IP - you probably don't have any
use for the other modules and they require configuration.
- On the adapter selection screen, click Other Adapter
- Mount the AMD PCnet driver floppy (which you can find
here
) and press
OK; It
should find the driver
- Make sure you select Ethernet and not Token Ring!
- Click the TCP/IP tab in the upper right and fill in the
following
- Host name: whatever you like
- IP address: 10.0.2.18
- Subnet mask: 255.255.255.0
- Router address: 10.0.2.2
- Now click the little right arrow next to "Page 1 of 2"
- Name server: 8.8.8.8 (or your DNS of choice)
- Click Install
- You will get a "you did not configure your adapter" error; click
OK, then
press OK on the popup window to continue, and click Install again to begin the
installation
- Open up the OS/2 command prompt and ping google.com to verify network access.
- For higher resolutions, see the "Installing Graphics Drivers on Warp" section

Note: The install process for Warp 4 is similar to 3 but subtly different, so pay
close attention.
Get the ISO from
winworldpc.com/product/os-2-warp-4/os-2-warp-40
IBM OS2 Warp 4.0 (ISO)
- Create a Virtualbox machine. Select OS/2 Warp 4 and accept the
defaults. 2GB disk max.
- Mount the install CDROM and the disk called Installation.img, boot the
machine.
- When prompted, swap in disk01.img. You'll get into the installer.
- Select Advanced mode
- Accept the hard disk as-is
- Select High Performance File System
- Wait through the copying phase
- When it asks you to remove the diskette and press enter to restart, do so.
- If you reboot manually without pressing enter here it might mess up the
install.
- Remove the floppy from the virtual drive and press enter.
- It may, in fact, fail to reboot at this point. That's fine. You have to let it
try, and if/when it hangs at a black screen, THEN reset the machine.
- On boot you'll get the graphical config interface.
- If you just get a blinking cursor, reboot a few times.
- All the defaults on the first page are fine except for CDROM, Audio, and
possibly region
- For some reason it defaults to United Kingdom for region and keyboard; maybe
because this ISO is region-ed. Change it to United States or you won't be able to enter
backslashes.
- For CD-ROM Device Support it should default to "IDE CD-ROM"; if not, select
this from the list.
- For Audio, pick Soundblaster 16 PnP
- Continue
- You shouldn't need to install anything on the second page; continue
- You probably don't want a printer, so hit OK
- You probably want to select all the boxes on the software configuration page
(BonusPak, in particular, is an office productivity suite) and click
OK
- On the dialog with TCP/IP, File And Print Client, etc, the only setting you
want is probably TCP/IP. Everything else installs outdated protocols and tools.
Click Next
- On the network configuration screen, select Network Adapters
- There should be an AMD PCNet already. If not, add one.
- Select TCP/IP Services
- If you have DHCP, enable that; otherwise set all the values to fit your
network. "Router" means default gateway.
- Click Install
- After reboot, the machine is ready to use.
- For higher resolutions, see the "Installing Graphics Drivers on Warp"
sectio
I maI may add detailed instructions for 4.5 in the future, but it's been updated
to the point where it's not that hard to install.
You can get the disk here:
https://winworldpc.com/product/os-2-warp-4/os-2-warp-452 IBM OS2
Warp 4.52 (4.52.14.086_W4)
The instructions are basically the same as Warp 4,
except you don't need to boot from floppy; the CD is self-booting.
Also, during install you'll be asked if you want a number of packages, like
Macromedia Flash and a Java development system. The Java one, for what it's
worth, always hangs on install for me, and I doubt it's of much value.
Installing Graphics Drivers on Warp
Now that you're started up, you're going to want graphics drivers. Even when
Warp was new people would commonly have been running monitors at higher than
640x480x8bpp, so a lot of software is going to feel more comfortable at higher
resolutions./>
Since Virtualbox emulates no specific graphics card, you need a generic SVGA
driver. Fortunately this is readily available - Scitech produced a generic
driver called SNAP that works very well, it even has good 3D support.
SNAP is not hard to find, but there are two issues:
- It's an EXE you'd have to figure out how to get into your VM
- It requires you to apply patches that are kinda hard to find and get into the
VM
To help you, I've prepared an ISO
with the driver, the serial number (yes!
this was a commercial graphics driver! it cost money!) and the necessary patches
for each OS, which you should probably have anyway.
Installing SNAP on Warp 3
For Warp 3 you have to do a very irritating patching process (sorry, I couldn't
simplify it any further.) Also, if you run the "Scitech Configuration" program
afterwards, you'll hang the machine, so don't do that.
- Mount os2_snap.iso
- Open the CDROM from Drives
- Drag (with the RIGHT mouse button) the folder WP3FP40 to your desktop and let
it copy (a window will pop up but it won't look like it's doing anything; it is)
- Open an OS/2 Command Prompt (C: icon on the "taskbar")
- CD C:\DESKTOP\WP3FP40
- MKDIR EXT
- CD EXT
- ..\DIUNPACK.EXE ..\XR_W040.1DK
- A bunch of files should extract; repeat for all 20 patch files
- The extensions are ordered by number and then letter: 1DK, 2DK, 3DK... then
ADK, BDK, CDK...all the way to KDK
- You can press up to get the last command, then just arrow back and change the
one letter and press enter
- When all are extracted, execute: ..\OS2SERV.EXE C:\DESKTOP\WP3FP40\CSF
C:\DESKTOP\WP3Fp40\EXT
- The Corrective Service Facility will launch; follow the steps to install the
FixPack, then reboot
- Now follow the exact same steps from the Warp 4 instructions below, starting
from "Double click SNAP_OS2.EXE"
- Enjoy!
Installing SNAP on Warp 4
Note: You do not need to do this for Warp 4.5, it comes with
a VESA driver. Just skip straight to setting the resolution.
For Warp 4 it's pretty straightforward:
- Mount os2_snap.iso
- Open the CDROM from Drives
- Open WP4FP15
- Double click INSTALL.CMD. This will launch the Corrective Service Facility
- Select the one item in the list if need be and click Service
- In the window that pops up, you need to enter an Archive directory in the
middle field. I suggest C:\ARCH. Then click OK
- You will get a warning about locked files. Click Continue.
- Install will take a while.
- When prompted to overwrite files, click OK
- When finished, reboot (remember to Shut Down from the desktop, then reset)
- Open the CDROM from Drives again
- Double click SNAP_OS2.EXE and follow the steps to install
- You will get an error about an unsupported graphics card; that's normal, click
OK
- Let the installer reboot. You should see a Scitech splash screen on startup.
- Go to the Warp Menu > OS/2 System >
System Setup > System
- Select a new resolution and color depth (look for "256" above the res list and
change it to "16M"), then close the window and reboot
- You should now have high resolution, high color graphics.
- Open the Scitech folder on the desktop and start "Registration Tool"
- Look in SNAP_OS2.TXT on the CD for the name and serial number and input them
- You're done!
Now What?
So what should you do in OS/2?
Good question. I don't actually know yet. Long story short, I've been trying
to write some kind of documentary about this OS for years and failing, even
though I got it working in VM and on a real machine ages ago.
What I can tell you is this: OS/2 enjoyed remarkable success as an underdog,
and in its day there was plenty of software for it. There are a number of major
commercial applications available for it, even some games, and bits and pieces
of all sorts that you can scrounge up online. Beyond that, just dig through it,
experience it. It's a weird piece of software.
Getting Files Into the VM
The first thing you'll need to be able to do is to actually get software
into the VM.
CD images are the most obvious route, since OS/2 natively
understands those, any large commercial software package you find online has a
good chance of being in ISO format, and you can make ISOs trivially from files
on your computer with any CD burning app.
Floppy images are also an option but there are no good free
manipulation programs. If you find software online that's already in IMG/IMA
format that's one thing, but if you want to make your own floppy images it's
tough to do except from inside a VM, which is a chicken-and-egg problem.
FTP could work to move files between a local server - there
are several very simple and free FTP servers out there you can set up, and
there's an FTP client built into OS/2, I think from 2.x up.
A web browser is probably the most convenient option if you
can work it. Any site that's plain HTTP can be accessed with the basic browser
included with several versions of OS/2, and certainly with Netscape, which you
can get here and move
into your VM via an ISO, as described above.
You can also run a local HTTP server, such as
Miniweb - just put files
to transfer in htdocs and (supposing your computer's real IP is
192.168.1.100) access them at http://192.168.1.100:8000/
Accessing HTTPS sites is a problem. Any browser released before the late
2000s - which covers everything ever officially released for OS/2 - will not
access any modern website. I'm told there is a Firefox 45 build for this OS but
I still don't know if that fixes the HTTPS issue.
Running Software
I have limited experience with running OS/2 software at all, but here is what
I've learned so far:
- A lot of what you find out there, especially if it's derived from GNU
software, requires extra libraries and does not communicate this in a very
clear way.
- If you click on a program and it just pops up the properties instead of
launching, try executing it from an OS/2 command prompt - it will probably
emit an error saying it needs a specific library.
Finding Software Online
There are a number of substantial OS/2 hobby and resource sites where you can
find software, as well as drivers etc. to make OS/2 work on real hardware.
Hobbes always deserves mention. It's
kind of a bulk file repository for basically everything imaginable for OS/2, but
it's just files with very little context or organization, and you won't be able
to load it inside of OS/2 itself without signficant effort because as far as I
can tell it's HTTPS-only.
eCSoft is another popular resource, but
unlike Hobbes they don't seem to host much themselves, just link to other sites,
so you may find broken links. They do however have plenty of info and
screenshots on each program and
Internet Archive doesn't have a lot of easily located OS/2 software, but my
recollection is that a lot of DOS/Windows software CDs from the 90s had OS/2
directories. So there's that.
OHFOWG
is a compilation of OS/2 Warp games. I have not been through it at all
thoroughly but you can check it out; I'll advise you that it's 1.8GB, but Warp
4.5 (at least) will read a DVD happily, so I extracted it, dumped it into a DVD
ISO, and mounted it successfully.
If this was interesting to you, or if you did something interesting with it, email me: articles@gekk.info
If you like my work, consider
tossing me a few bucks. It takes a lot of effort and payment helps me
stay
motivated.
List of Articles