While the Business Communication Manager is much simpler than some PBXes (IP Office, Cisco Call Mangler, Definity) it still follows in the industry tradition of being incomprehensible to newcomers. Almost all documentation online is intended for people who know something of what they're doing, and on a device like this, that means reading and digesting the entirety of several massive paper tomes.
You do not have time for that. I'm going to tell you how to make calls go IN and OUT of the BCM50 you just got out of the trash.
It is assumed you know what a BCM is, otherwise you wouldn't have one. It is also assumed you have, and understand how to use, a VoIP trunk; I don't have an analog breakout box for my BCM yet, so I can't tell you how to hook up POTS lines let alone PRI/BRI. You will also be setting up a VoIP softphone; I don't have any BCM IP phones yet, so I can't tell you how to use those either.
Hard drive backup: The BCMs have hard drives inside. They are getting old and will die soon. There is nothing special about the drive itself, but the contents are precious; get an image before you do anything else. You can figure out how to open the box and get the drive out - and how to use a USB adapter and dd on linux - by applying yourself. The resulting image will be big; don't worry, just zip it, it'll get much smaller. Do this before you do anything else. Don't say I didn't warn you.
Hard drive replacement: You are thinking of writing that image to an SSD; the machine uses SATA, after all, and this way you won't need to worry about the drive dying. Save yourself the headache: most SSDs will not work for some godforsaken reason, but any spinning disk should, so stick to those for best results. There is a rudimentary list of ostensibly compatible SSDs if you really want to do it.
Licenses: Your BCM has license keys on it. You really don't want to lose those, because literally every single thing the device can do is gated behind a license. If you wipe them all, the BCM becomes a pumpkin. These are also bound to the device and cannot be transferred, so back up the hard drive. Also, some of the steps in this guide might not work if you're missing a license. Sorry if that happens.
Firmware: This guide assumes your BCM is on Release 6. I don't know how to find out if it is, the web interface is terrible, and I don't know how to upgrade one. We will hope that most BCMs got updated before they were pulled from service.
Software: You need Avaya Business Element Manager version 62.0.5 - a download link is provided below. I have read that versions prior to this can brick your device irrevocably, so don't use them. You have been warned.
Java: The BCMs, while cool, are still corporate telecom sludge, and that means you need to interact with Java to use them. If this doesn't put a chill down your spine, then you need to follow my setup instructions to the letter. Your payoff for ignoring this advice is an infinite series of gibberish errors which will lead you in circles.
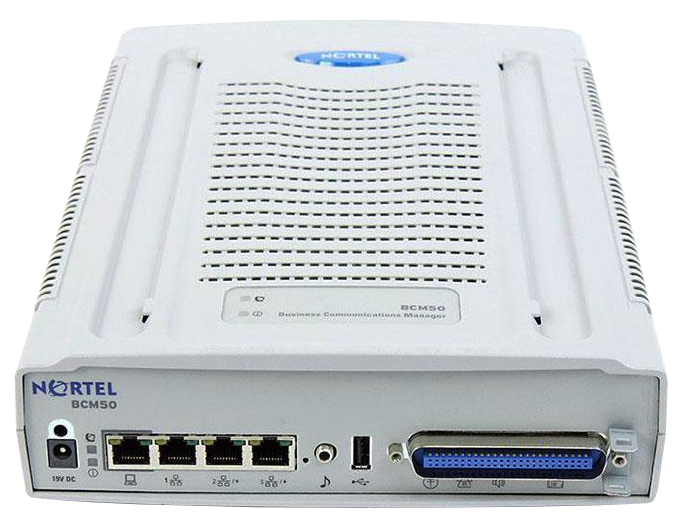
Models: I only have a BCM50, so everything in this document assumes you do too; as far as I know, the other models are exactly the same, just with bigger numbers, so the trunk/station limits are higher etc. I can't swear that everything here will apply to e.g. a BCM450, but I get the impression that it will.
The basic steps we will be taking are as follows:
If you have a BCM50 and need a power supply, it takes the same 19V as a ton of laptops. If you have a 19V laptop supply that fits, it will probably work. The sticker on the BCM says 6.3 amps; you don't need that much to get started, I run mine off a 3.3A with no problems.
When you power up the BCM50, it is going to take over five minutes to boot. This is longer than you think. I don't mean to be condescending, it's just really hard to get used to a computing device taking this long to start up - no matter how many times you go through it, it is still unbelievably slow. You'll know it's mostly booted when the fan slows down from a scream; it's even closer once the top LED stops blinking yellow and turns green. PS: A blinking red top LED is an alarm, which often mean nothing; a red power LED means the HDD is toast.
Even after the five minutes has elapsed and the machine is notionally "booted," it still takes eons for the services to finish "settling" and stuff will intermittently seem to respond but not work correctly. My advice: On the first boot, give it 20 minutes to be sure before you waste any time trying to get in.
Before you proceed, you need to set up a Windows XP machine. Some will say you don't need XP, and they're right to an extent, but it will save an enormous amount of misery in my opinion and experience. It's also very easy; a VM will do fine. But you need XP for two reasons:
Seriously, it's worth the effort. Just get a cracked XP ISO and install it on a Virtualbox VM, it takes ten minutes. Make sure you set the network adapter to Bridged mode - if you leave it on the default NAT setting you won't be able to change the IP for the guest OS, which you're going to need to do.
Once you have your XP system, install Java 1.7u80, specifically. I've included the 64 and 32 bit installers, as well as the BEM installer, here. There's also an ISO file with it all rolled up together for burning to a disc or loading into a VM. Once that's done, run BusinessElementManager to install the app. It'll take a long time for the window to appear; just let it cook. Once the BEM is done installing you should have a shortcut on your desktop. If that fails to launch, congratulations, you didn't use XP; set up a VM and try again.
Assuming the BCM has had plenty of time to boot, you now need to connect to the "OAM" port: it's the first Ethernet port near the power jack, with a PC icon. Please be aware that this port emits DHCP by default, so in theory you can plug a PC straight into it. If you plug this into your network, it could issue IPs to your other PCs; this is bad if you leave it hooked up long-term, but is harmless in the short term.
You now need to determine the IP on the OAM port. The default is 10.10.11.1, subnet mask 255.255.255.252. Your PC should get issued 10.10.11.2 via DHCP if you plug it in directly, in which case you're golden. If you plugged it into a LAN, you'll need to assign the IP statically.
Try to ping 10.10.11.1. If you don't get a response, the IP might have been changed by the previous owners. In this case, plug your PC directly into the port and see if you get DHCP. If so, try to ping the default gateway you receive. If you get a response, that should be the BCM. For the rest of this document however, we will assume the OAM was at the default IP; change it where appropriate.
Now you need to do some silly Java nonsense:
Note: If you aren't on a clean OS install, you might have another version of Java installed. Go over to the Java tab, click View, and uncheck all versions except 17u80. If you have problems later, uninstall all other versions of Java.
Now launch BEM. Assuming it starts up, do the following:
If you instantly get a message stating that the device type could not be identified, that means one of two things: One, the device is not on the same IP subnet as your PC. Check that you can ping it; if not, check your IP config. Two, you have the wrong Java version; uninstall EVERYTHING except 1.7u80, restart BEM, and try again.
(I have seen a case where this also happens after reimaging a BCM, because Java stored a site certificate which needed to be deleted; this is in the Java control panel under Security > Manage Certificates, just blow away any entry for the BCM.)
If you get an invalid credentials error, you're in a pickle. Google for backdoor passwords; I think there are some out there. If you can't find one, you will need to factory reset the BCM50 to regain access to it. Since this will also wipe all your license codes, it's kind of pointless unless you have them in hardcopy so they can be reentered; some people actually did write them down on the device itself however so it's worth looking. We will proceed, assuming you did not run into this problem.
Before we can start setting things up, you will need to make the BCM available on your LAN properly.
The FIRST port on the BCM is "OAM", reserved for maintenance. The remaining THREE are normal LAN ports, and share a single IP interface; this is what the BCM will use to make VoIP connections to sets and trunks, so you need to set it up.
Move the Ethernet cable to one of the LAN ports. Remember to switch your PC back from the 10.10.x.x IP before proceeding. Try to ping the new IP you set; if it doesn't work, go back to the OAM interface, reconnect, and run through the steps again. Otherwise you're ready to proceed.
Go into the Java settings and add exceptions for the new IP just as you did for the OAM IP. Re-add the device to BEM, and you should now be able to connect to it. If you get weird errors, check the Java security exceptions, and your PC's IP address, and then go back to the OAM interface and check the IP settings again.
Assuming you're now connected, I recommend a cold reset. While you can't factory reset a BCM without losing the licenses, this step will wipe all existing phone-related settings, which is really handy since the previous owner could have left the machine in an unusable state. I also think it's a good opportunity to switch the system to 4-digit extensions. I personally dislike three-digit for reasons I can't articulate, so if you agree, this is the right time to implement it because later it will be much harder.
Go to the Administration tab, above the list of config sections. You might want to go to Backup and Restore and perform a backup, Just In Case; I'm not sure what it backs up, but it's supposedly pretty complete. Once that's done, go to Utilities > Reset and click Cold Reset Telephony Services.
In the dialog that pops up, you want to select "DID" under Template, and if you want four-digit extensions, change the "Start DN" to a four digit number - I went with 2000 and will assume for the rest of this document that you also did.
The cold reset will take a LONG time. Give it fifteen minutes; once it's done, it's not done, so go into the Utilities > Reboot menu and reboot the system. Give it another 20 minutes to fully, completely start, and now we can actually get programming.
I find it most useful to get a phone connected before doing anything else. I am going to tell you how to set up the Nortel 2050 Softphone, since you can just run that on your PC.
Avaya made a later version of the 2050; don't use it. Download the Nortel version from here. Extract the zip in "PC2050 V2 Build 0239" and run the installer. Then run the installer in "Upgrade setup 264." Now launch the app.
Go to File > Settings, then to Server. Uncheck DHCP. Enter the IP you chose in the IP field. Set Type to BCM. Click OK. The phone will reset, and you should get prompted for a registration password; if not, check the IP settings again.
Nobody seems to know the default registration password anymore, so you need to reset it.
Now go to the softphone and enter that registration password.
You should now be prompted for your "New DN." Remember when you did the Cold Reset, it asked for a Starting DN? Suppose that was 2000; you can pick any DN from 2000 to 2111 here. When you click OK, you should get "Connecting to server" - this is good, it means it worked. Give it 30 seconds to bind your phone, and you should now have a working softphone.
Warning: It is assumed that you already have a VoIP trunk and know what you're doing, but still I feel it's prudent to point out here that VoIP fraud is unbelievably common and devastating. If you set up a VoIP trunk insecurely, you can get hit with literally tens of thousands of dollars in charges which you will not escape. Use an extremely good password. Do not expose your PBX to the internet unless you're an expert. Enable monthly spending limits if your provider supports them. Disable international dialing through your provider's website. Do not take this lightly; I have known many who regretted it.
Setting up a trunk is very easy.
At this point your trunk should register. You can check this at your ITSP end if possible. You can also click on the new entry under Accounts, then go to the User Accounts tab at the bottom; this shows the primary registration for the trunk. This is also where you would register additional accounts if, for instance, your provider requires one registration per DID. You can also populate some important values like CLID number / CNAM override, P-Asserted-Identity, and some other useful overrides.
Because this is a classical PBX, you're going to have to set up that infuriating "dial 9 for an outside line" nonsense, and you need to start here.
Why do we need to do this here? Once we're done setting this up, you're going to dial an outside number by entering e.g. "92065552929" on your set. The 9 obviously needs to be stripped off before going to your trunk provider; this is called "absorbing," and it's what we just set up. When this trunk receives an outbound call attempt, it will match it based on the 9, and then delete that 9 before sending it out. It might be possible to strip the 9 earlier in the process, but then I don't know that the trunk routing policy we created would work.
In any case, we now need to create the other outbound rules.
Alright - at this point you should be able to make an outbound call. On the softphone, click the green speaker icon to go offhook, then dial 9xxxxxxxxxx. On the last digit, the phone should try to dial instantly; if it just hangs there or you get an error about the call being disallowed, you probably skipped a step.
Note: I haven't gone much further than this myself yet, but obviously you don't want to have to manually add every single extension to the line pool as you create them. The reason this is necessary, as far as I can tell, is because Sets get opted into all the "analog" line pools automatically, but not into the "BlocX" pools. The only place I can see to fix this is in Set > Templates; you can't edit the default "DID" template, but you can make a new one based on it, then add BlocA to its config, and new devices should inherit that automatically. YMMV
As with all PBXes, handling incoming calls is far more complicated than outbounds. I am going to offer several options, but first I need to explain a fundamental concept in these devices - poorly, since I only sort of get it myself.
This is incredibly confusing at first but if you don't understand it you will have a very bad time. You can skip this section if you're in a hurry to just get an inbound call working, but come back to it later, you'll need it for anything to make sense.
In many pure VoIP systems there are just two concepts for "thing that can place/receive a call": one is a "trunk," and the other is a "seat", "user" or "extension." The difference is that the former has no identity attached to it, it's just a thing that can accept calls based on a dialplan, while the latter identifies a specific end user or service. BCM is based on much older ideas, some stemming from old-school PBXes, some coming from Nortel's big-iron CO switches.
There are two primary concepts to understand:
An important distinction between these concepts is that a phone can see many lines, but it can only have one DN associated with it. This gets weird.

Here's a softphone setup. There's a lot going on here. The six keys at the top are a mix of:
These keys appear dynamically, as you point different services at a DN. When first set up, a phone has nothing but a single IC button. If you add that phone to a hunt group, an HG key appears; if you assign it to a line, one or more line keys appear; and so on. What's odd about this compared to many more modern systems is that calls are "sticky" - in a VoIP system, a call might come in through a hunt group, but once you answer it, the call becomes "anchored" to your extension. This is not so for BCM; an HG call remains stuck to the HG line key for its duration. It's a strange system.
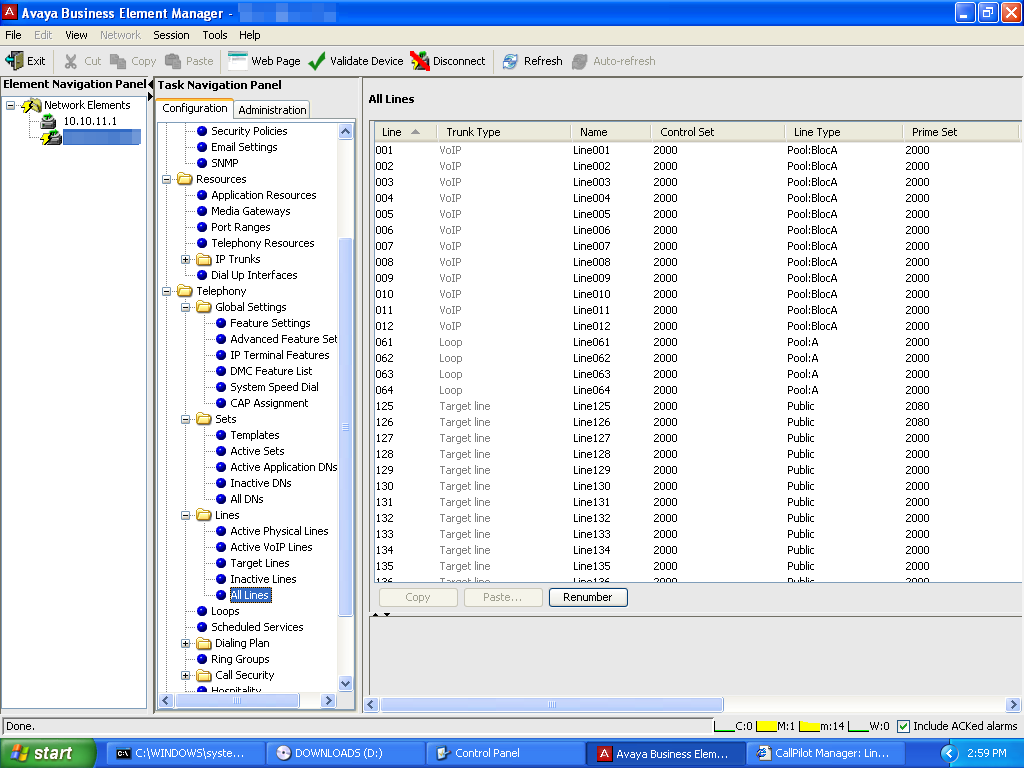
Under Resources > Telephony > Lines > All Lines you can see the BCM's line array. The first 12 entries represent VoIP trunks - this is because the BCM50 only supports 12 concurrent VoIP calls. If you had a 200 or 450, there would be a lot more of those. Likewise, the next four are "Loop" - these represent the four physical FXO ports on the BCM50.
Notice that there is a break in the numbering. VoIP lines are in the 10s, while Loops are in the 60s, so that probably provides extra allocation space for addons. I would expect that if you installed an analog expansion, you'd see more Loops in the 60s, while a BRI/PRI expansion would probably produce Channels or something, very likely in the 80s or higher.
Beyond those we get into Target Lines, which are... weird. Analog lines can be bound directly to phones - just pick one, go to "Assigned DNs" and enter a DN; the line will appear on the phone, and now you can place and receive calls through it. But for VoIP or BRI/PRI trunks, since you can have an infinite number of public numbers (DIDs) assigned to a single trunk, you usually want a way to break out incoming calls based on what number was dialed, so they can go to different people. This seems to be the point of Target Lines.
Suppose the "main number" of your company is 2065551234, and you only want that to ring the receptionist. You need to configure a Target Line to match with that number. Now incoming calls will ring that line, and if you bind it - as above - to the receptionist, all incoming calls to the main number will now go to her phone. From there she can transfer them to users via extension.
But suppose you instead want the call to go to a hunt group, to be distributed to many users. Or to an ACD, to sit in a queue until an agent is available. Or to an auto attendant menu. In pure-VoIP systems, you would often assign the phone number directly to one of those services, but here you can't. The number still gets assigned to a TL; the TL "rings" when the number is dialed; and those services can then observe the ringing and grab the call, much the way an answering machine passively observes a line and picks up after a desired number of rings. CallPilot, in fact, works exactly this way.
Now that those concepts are understood, we'll build an inbound route, then I'll give you three ways to use it.
The first step is to assign an incoming DID to a Target Line. We'll assume your public number is 2065551234.
By default, BCM (and most PBXes) ignores the first 6 digits on incoming calls; it sees the above number as "1234" and doesn't care about the "206555" (known as the NPA-NXX.) This means that if you also own the number 2065351234, the PBX will see that as "1234" as well.
If you're in this situation, you need to go to Telephony > Dialing Plan > Public Network and set "Public Received number length" to 10. Then, instead of writing '1234' below, you would use the full ten-digit number.
Now you need to do something with calls that come in to that line. I'll offer three options.
You should now be able to call the public number and the phone should ring.
An important detail: As far as I can tell, a hunt group will never deliver a second call to a user who's already on a call from that hunt group. Other lines don't matter - if you have an internal call, or a call from a separate hunt group in progress, it'll still ring you, but if you accept a call from HG01, that hunt group will never attempt to deliver a call to your line until you end the first one.
This can be awkward, because in the default configuration, if all participants in an HG are busy with calls from that HG, incomings will go to busy signal. You can fix this in the "If Busy" field for the HG - "Overflow" will cause calls to go to the DN specified in the Overflow field, where you could put a user or another HG, since each one has its own DN. I don't know if there's a way to use this to send calls to e.g. an auto attendant.
For this, you will need to start looking at Callpilot, the application server component of BCM that handles voicemail, auto attendants, ACD and conferencing, among other things. This is managed from a webapp, and the easiest way to get there is to go to Applications > Voice Messaging and click "Launch CallPilot Manager."
This will open an IE window and take you to the Callpilot UI. Log in with the same creds you used for BEM. You will be taken through an initial configuration stage; just accept the default values. Once you're in, do the following:
The greeting table itself has fixed functionality by default, it'll just play a prerecorded greeting, then allow the caller to enter an extension or use the directory. From the "Greeting Tables" section you can change which greetings play and when, but the basic functionality doesn't change unless you use the CCR feature. This is a big complicated mess, I'll leave it for you to figure out.